
A Little Piece Of Colours - Covergirl Eye Enhancers In "Tropical Fusion" Quad And What The "Expert" Says

Oopsies,
I've just realised that until now I have not written a single post on a
Covergirl product given that Covergirl was the first makeup item I ever
purchased. It was the beloved green Marathon Waterproof Mascara
Hydrofuge but no idea WHY they discontinued it. I finished my first tube
and was in total awe but now I'm in such a loss because the only tube
of this one I could find, sure I brought it home right away but the wand
came off and got stuck on the bottom of the tube :( and since I can't
use it now it's almost dried up :(
It's
such a great real waterproof mascara but as I don't have a decent
product to write about, I can just rave about it and mourn over its
discontinuation.
 |
| Bring it back Covergirl, you've committed a severe crime! |
Anyway, stop the ranting and weeping, today I present to you the Covergirl Eye Enhancers in Tropical Fusion.
I got it awhile back, when I was still in the mood of bright colours so
this is an obvious choice. Not many people have talked about Covergirl
eye shadows but as they provide such a vibrant and fun quad, I thought I
should give it a shot.
This is a newer design, pretty square edges in a grey plastic palette with a clear cap, unlike the original packaging which is rounder and in royal blue. It also comes with a double-ended sponge tip applicator that can be quite handy to build up the colour intensity. I kinda like using such applicator sometimes to pat the colour on and use a fluffy brush to blend out the edges.
PRICE: may vary, but generally it's around $4.99 or less for 0.19oz / 5.5g of product.
 |
| Back packaging + Ingredients list |


 |
| 2-3 layers without primer / base |
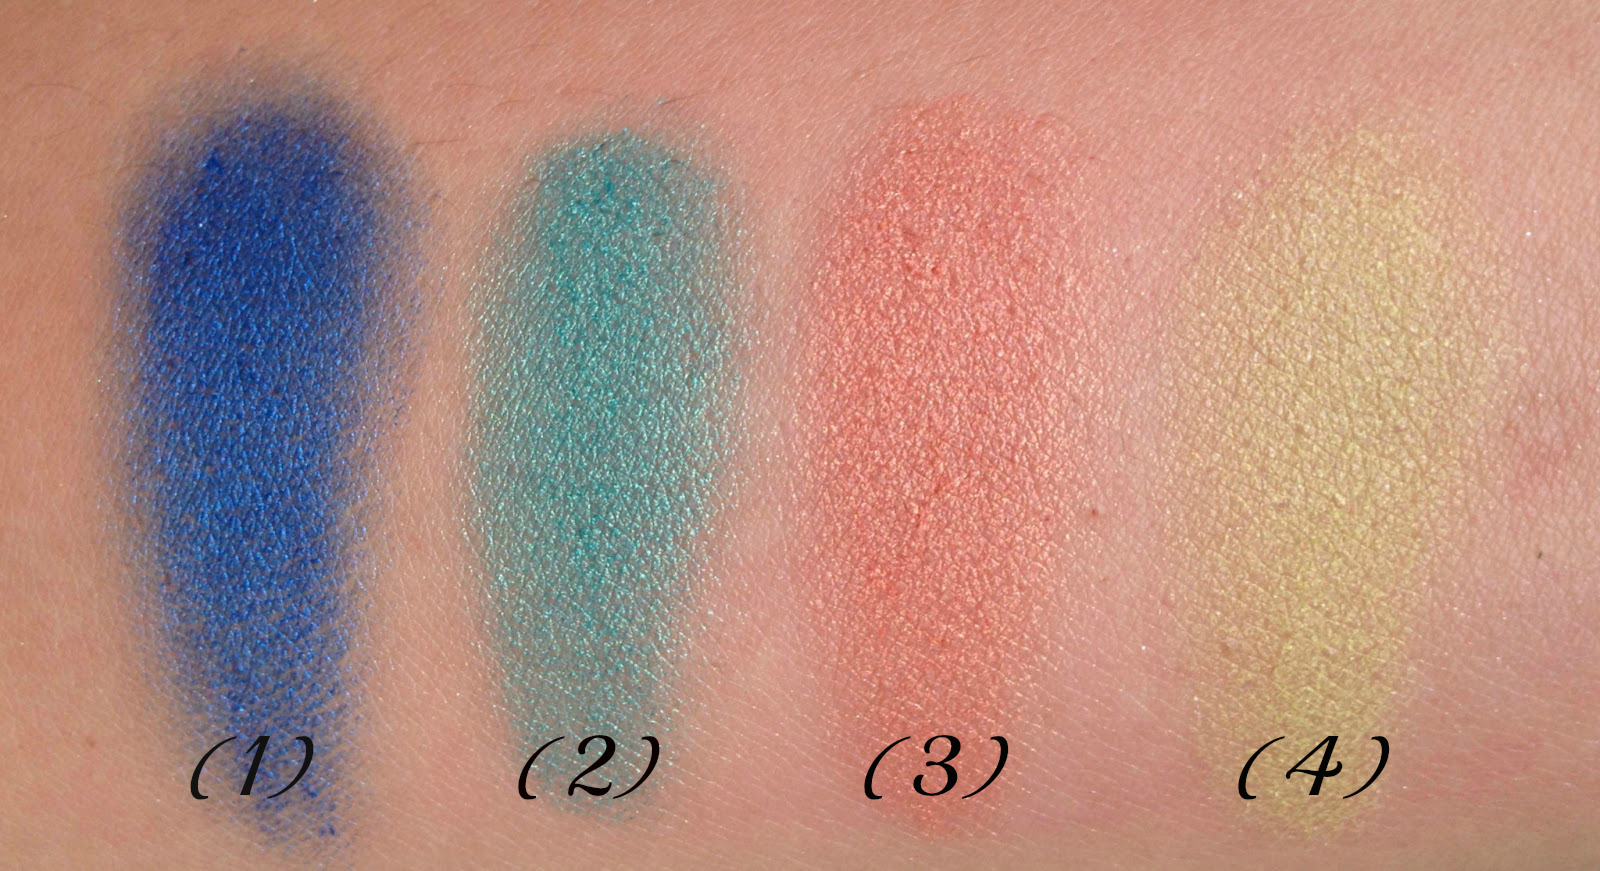
COLOUR PAYOFF AND FINISH:
(1) A navy blue
(2) A minty teal
(3) A basic peachy orange
(4) A pale mustard yellow
All four shades have a silky shimmery finish and are quite sheer, means you must build it up to get the intensity that these colours appear in the pan. However they all are soft, blend easily without much fallout. It won't look very shimmery on the lids though, rather velvety.
When swatched on my hand they look somewhat patchy due to being quite powdery and not as "creamy" as other eye shadows you may have experimented with. However on the lids they are not at all patchy and spread out evenly.
The only problem I find is that all colours are sheer (not really pigmented) so it takes time to layer them. Shade (4) - the yellow is a disappointment as it's so muted, pale and somehow the least pigmented shade among the four. It's quite forgivable though as it's hard to find a real yellow shade that is true to the colour in the pan. Of course they can be intensified by using a primer and/or a white base underneath, but if used alone they are quite subtle as pastel colours. I just wished the colour payoff was as intense as how they look in the pan (look at Wet n Wild Coloricon eye shadows, those are adorable and are even more gorgeous applied than in the pan). I'm not all about it but I do find it a nice little compact for a fun colourful summer look or just a pop of colour to brighten the day.
A LITTLE LOOK SUGGESTION:
This quad is actually
quite nice and versatile, you can use any combo to achieve a fresh look
(given that you use them in conjunction with some other shades that you
already have as well)
a. If you want to combine all the shades together, use the yellow (4) as an inner corner highlighter, the orange (3) all over the lid, the green/teal (2) as a crease definer and blue (1) for the lower lash line.
b. Use (3) all over the lid and (1) on the crease + lower lash line.
c. Use (4) all over the lid and (2) or (3) on the crease + lower lash line.
d. Use (2) all over the lid and (1) on the crease + lower lash line and vice versa.
e. Use any colour all over the lid and use a compliment shade(s) (I find brown and black are the easiest option) to define the crease with a light colour to highlight the inner corner.
I hope you find this post helpful and informative. Until next time!


0 comments